Window Overview
That window will allow you to configure your Instanced Animation Data and Renderers with a simple GUI.
You can open that window by pressing two times on the Instanced animation data asset or by using the menu path.

You can see a preview of your animation with the given data. By using the mouse, you can rotate and move the preview camera. The middle mouse button will reset it to the default position (also available by pressing the Reset Camera button).
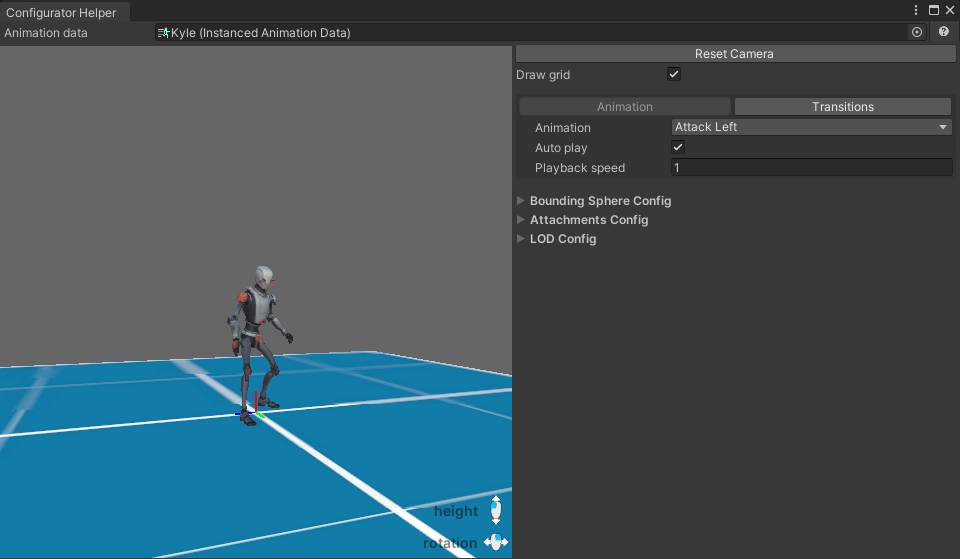
Preview
- Reset Camera
- Set the preview camera to the default position and rotation.
- Draw grid
- If disabled, the ground grid will be hidden.
- Animations and Transitions
- Select which one of them you want to configure.
If Transitions is selected:
- Start animation
- End animation
- Target of the transition.
- Playback speed
- Speed multiplier for the preview.
- Transition duration
- Time that the transition will take in the preview.
If Animation is selected:
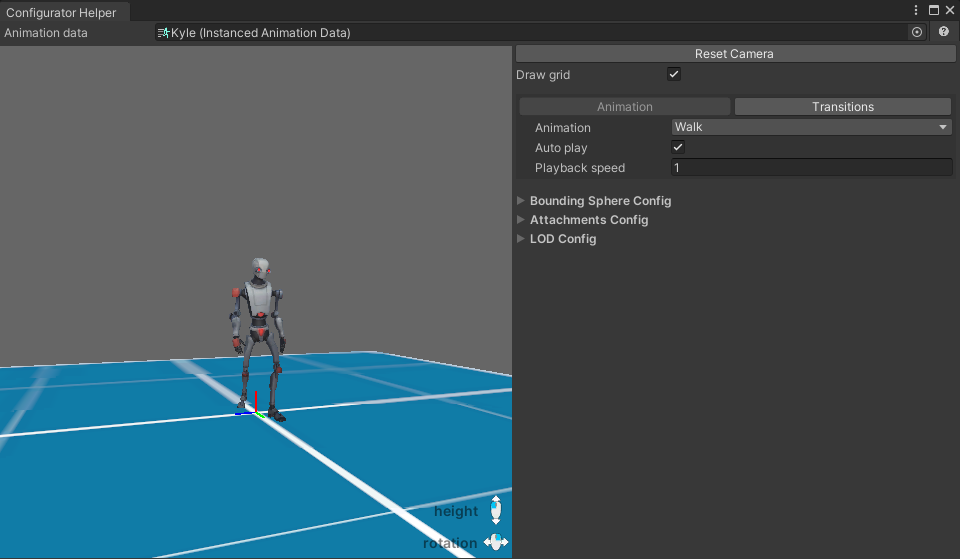
- Animation
- Select which animation should be displayed in the preview.
- Autoplay
- If enabled, the animation will be played looped. If disabled, you can decide which frame will be displayed by using the slider below.
- Playback speed
- Speed multiplier for the preview.
Configuration Area
At the bottom of the window, there are configuration tabs:
- Bounding Sphere Config
- Attachments Config
- LOD Config
Bounding Sphere Config
This config tab will decide about the culling of the instanced renderer.
You can configure the bounding sphere - an area that will be tested in visibility checks. If that area is unseen, the whole renderer will be culled. Try to fit the whole renderer inside the sphere during all animations, but do not make it much bigger to increase performance.
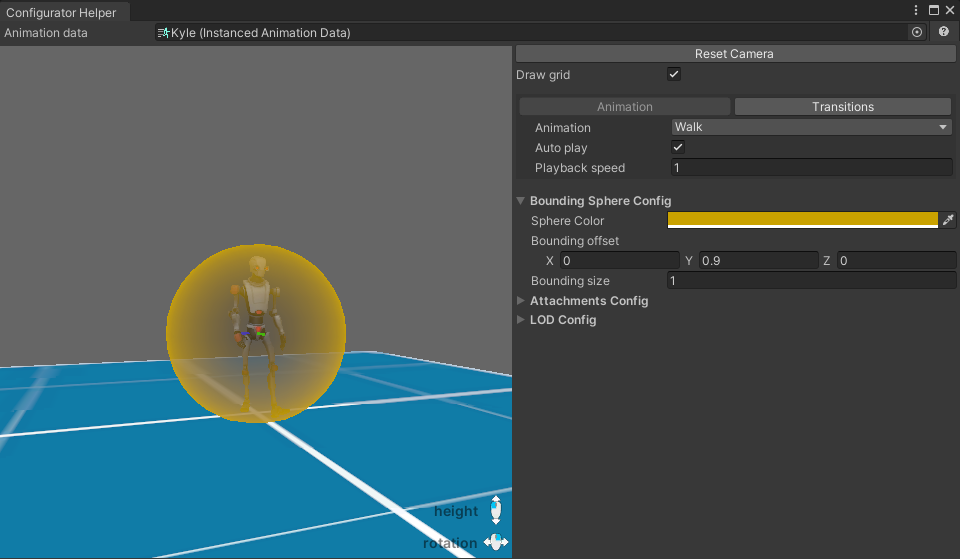
- Sphere color
- Debug only, no impact on runtime. Choose the color of the bounding sphere.
- Bounding offset
- Offset from Model Pivot to the center of the sphere.
- Bounding size
Attachment config
If you created attachment before, you can import data from saved asset by pressing two times on Instanced Attachment Data. You can also create new Attachment Data in this window.
Different Instanced Animation Renderers can use the same attachments only if attachment bone name is Exactly the same, but it probably will need a different offset, so we suggest creating an additional copy for each type of Renderer.
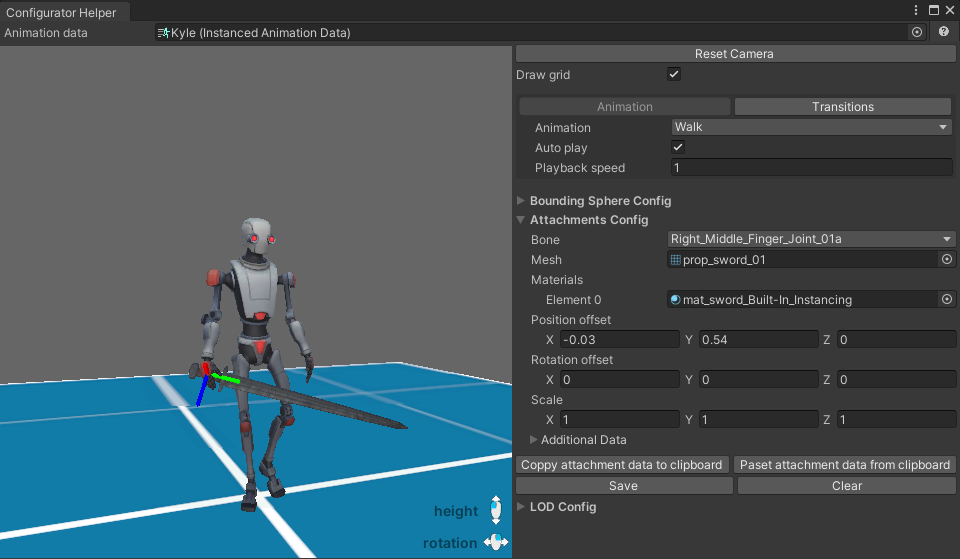
- Bone
- Select a bone for this attachment. Mesh needs to have Read/Write enabled in import settings.
- Mesh
- What mesh should be rendered. If you need more than just a mesh, use Bone Sync component.
- Materials
- Array of materials for each submesh of attachment. All materials need to have a shader that supports Instanced Animation System.
- Position Offset
- Offset in position, with the origin point on the selected bone.
- Rotation Offset
- Offset in rotation from bone rotation.
- Scale
- Additional Data This section allows you to configure specific features for better performance and utility
- Group ID
- If you need to have many attachments with the same mesh and material on the same Instanced Renderer type, but with some parameters changed (like Rogue that holds two daggers, but with different blade directions), they need to have a different GroupID. If you keep the same ID on few of them, the last initialized during runtime will overwrite all created before.
- LOD
- Decide how many LODs will use this attachment. The selected number of LOD is the last that will render it.
- Layer
- Decide on which layer that attachment will be rendered.
- Receive Shadows
- Decide if the attachment should receive shadows.
- Cast Shadows
- Decide if the attachment will cast shadows.
- Copy attachment data to clipboard
- Copy current data to clipboard. You can paste them on Attachment Data Asset by selecting created asset and selecting from the right-click context menu Paste attachment data.
- Save
- Allows you to save Attachment to assets.
- Clear
- Clear all fields in Attachment section
To use the attachment on instanced objects, you can add them component Instanced Attachment Behaviour.
LOD Config
If your skinned mesh contains LOD, you can set them up here.
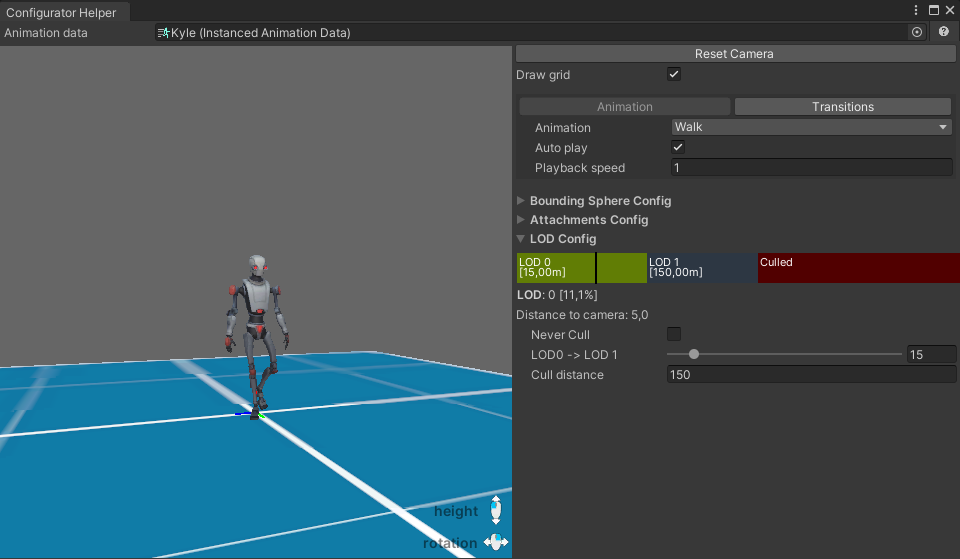
- Graph
- It's symbolic, representing blocks of distance in LOD calculation.
- Never cull
- If enabled, the object will never be culled for distance check. Not recommended.
- Cull distance - available only when Never cull is not enabled.
- Decide after what distance the renderer should be fully culled.
- LOD distance configuration
- Decide on distances for LOD transitions


