About
Each object with a mesh renderer and material will create at least one batch in the default situation. This can increase the time needed to draw a frame.
For static elements in the scene, you can simply reduce batches by combining meshes with the same material into one larger mesh, which will be drawn in a single batch.
Pros:
- Significant performance boosts.
- Possibility to save the combined mesh to assets for further usage and editing.
- Fast and reversible optimization.
Cons:
- It will consume some memory because an additional mesh is created.
- More vertices will be drawn when only part of the group is visible to the camera, as it will be treated as a single object.
Getting started
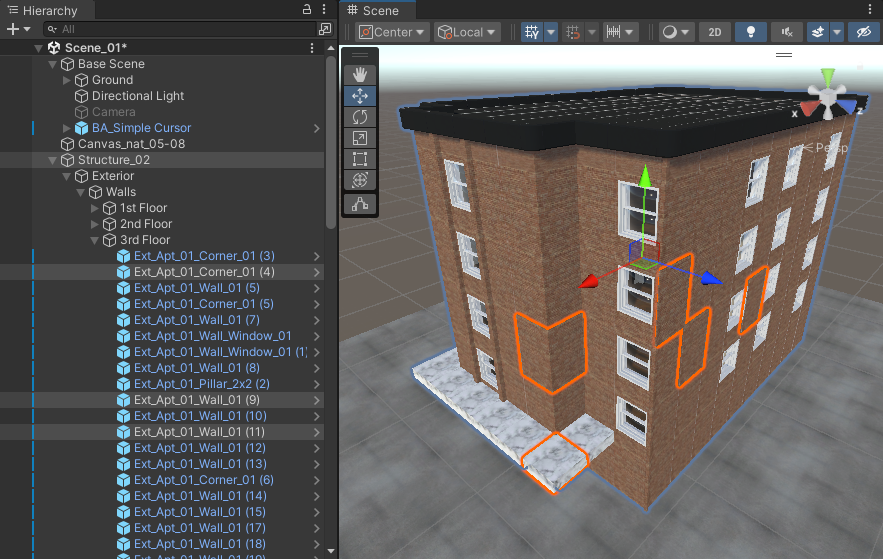
To use Mesh Combiner, you need to group objects with the same material in the hierarchy - the tool will work on ALL renderers in all child objects below.

On the screen, there is an apartment from "Apartment Kit" by "Brick Project Studio," a single parent that contains all segmented fragments to create the whole building.
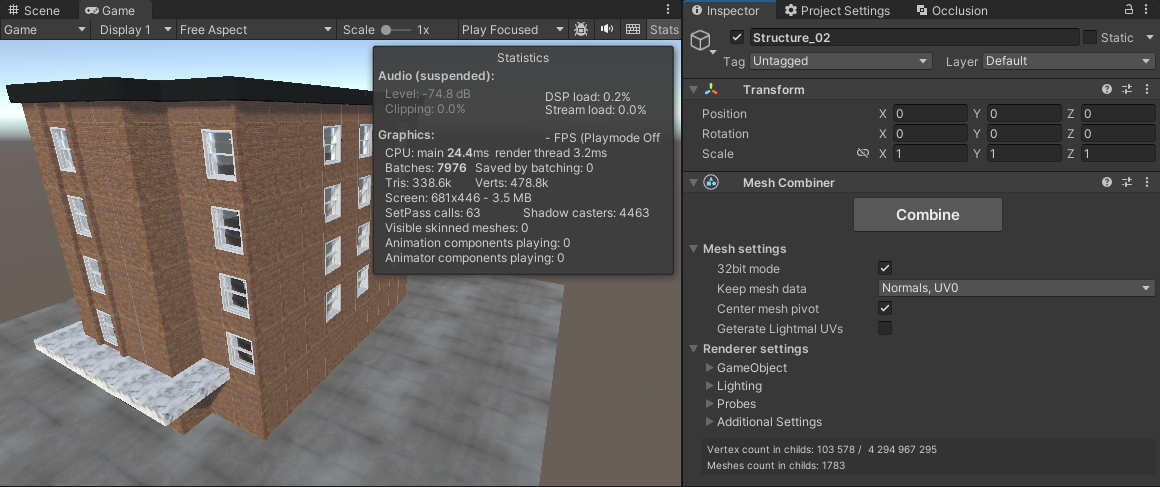
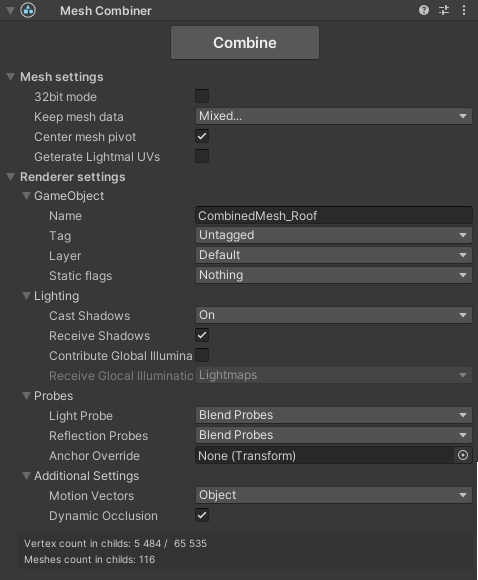
To use Mesh Combiner, simply add the Mesh Combiner script to the parent, and press the Combine button.

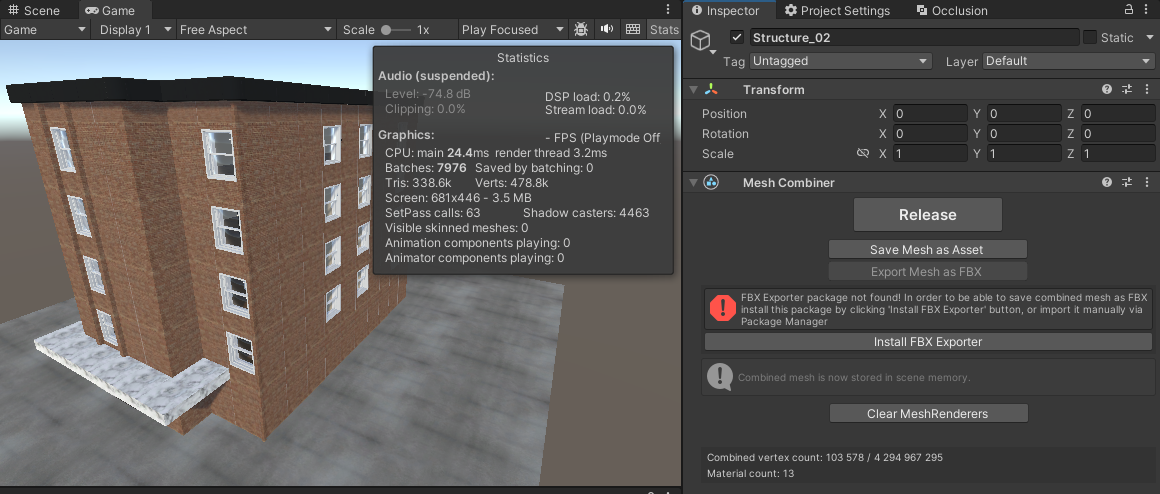
After the process, in the hierarchy, there will be a new game object called CombinedMesh_ParentName, containing a new Mesh created from all enabled Mesh Renderers in the parent's child objects. All used Renderers will be disabled, but other components will remain untouched. If you had colliders on them, they will still work.
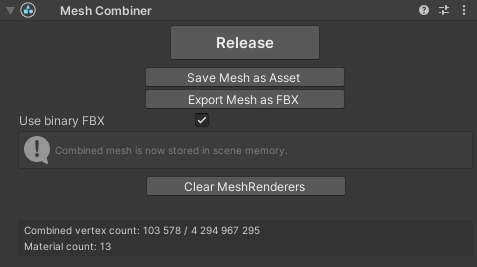
In the MeshCombiner Component, the Combine button will be replaced with the Release button, which will undo the combining.

You can have more than one material on Renderers that will be combined, and you can combine many meshes with different materials. Each material will get its own submesh on the combined mesh.
Saving Mesh
Created mesh will be stored in scene memory. If you combined meshes in a Prefab Scene, you need to save the created mesh to assets; otherwise, it will disappear after the Prefab Scene is closed.
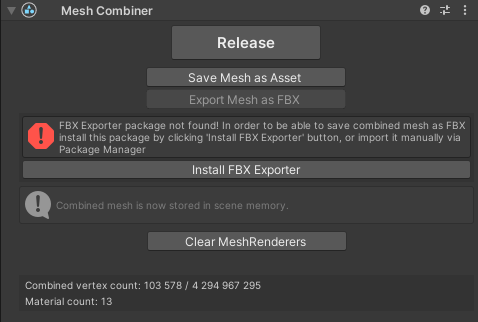
You can save the mesh as a Unity Asset or as an FBX. After saving as FBX, you can import it into a 3D designing program and perform modifications, which will not be possible after saving as an Asset. To do that, you need the FBX exporter package. If you do not have it installed, simply press Install FBX Exporter button or do it manually via Package Manager.

By pressing the Save Mesh as... button, you can select a destination, and your combined mesh will be stored as an Asset. Now, it can be used in prefabs.
Component Inspector
Detailed description of the Mesh Combiner component.

Before Combining
- 1. Combine Button
- This button allows you to combine all meshes in the hierarchy below this component.
- 2. Mesh Settings
- This panel contains the main combining settings.
- 32bit Mode
- Unlock support for a larger vertex count than 65,535. If children contain more vertices than that value, the Combine button will be disabled until you enable 32bit mode.
- Keep Mesh Data
- Select all data types that will be transferred to the new Combined mesh. The fewer options you pick, the smaller the mesh in memory. If you do not need all of them, unselect unnecessary data.
- Center Mesh Pivot
- If enabled, the combined mesh pivot will be centered between all selected objects. If disabled, the pivot will be at the world origin (0,0,0).
- Generate Lightmap UVs
- Select this option if you will bake lightmaps for this mesh. If enabled, UV generating options will be displayed below. This option will consume some time during combining.
- 3. Renderer Settings
- This panel contains settings for the newly created mesh renderer and its game object.
- GameObject
- Set name, tag, layer, and static flag for the GameObject that will contain the combined mesh.
- Lighting
- Set Cast and Receive Shadows, Contribute to Global Illumination, and Receive Global Illumination flags for the Mesh Renderer.
- Probes
- Configure Light Probes for the new Mesh Renderer.
- Additional Settings
- Configure Motion Vectors and Dynamic Occlusion for the new Mesh Renderer.
- 4. Statistics
- Panel that shows the current vertex and material count that will be combined into the new mesh.
After Combining

- 1. Release Button
- Removes the GameObject that holds the combined mesh. Note that the mesh saved as an asset will not be destroyed, but the unsaved one will disappear permanently.
- 2. Save Mesh as Asset
- Allows you to save the combined mesh as a .asset file in the chosen destination.
- 3. Save as FBX
- Allows you to save the combined mesh as an .FBX file. If this option is disabled, install the FBX exporter to enable it.
a) Use Binary FBX
- If enabled, the FBX will be saved as binary data; if disabled, it will be saved as ASCII.
- 4. Clear Mesh Renderers
- Removes Mesh Renderers that were disabled after conversion. Use this if you want to free up memory used to store meshes from disabled renderers. Permanently.
Tutorials and Examples
Video tutorials will be avaliable soon.


