About
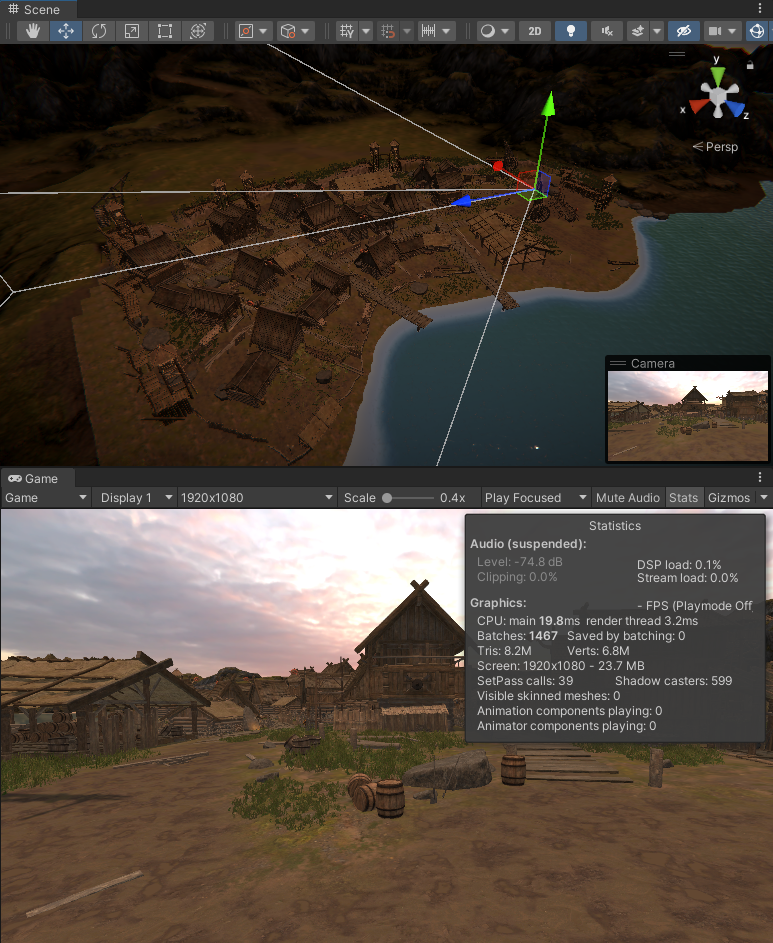
Scenes contain many vertices that will remain unseen throughout the entire game. A lot of objects in the background will never be seen from behind. By the window of the house in the background, you can see only a portion of the inside.
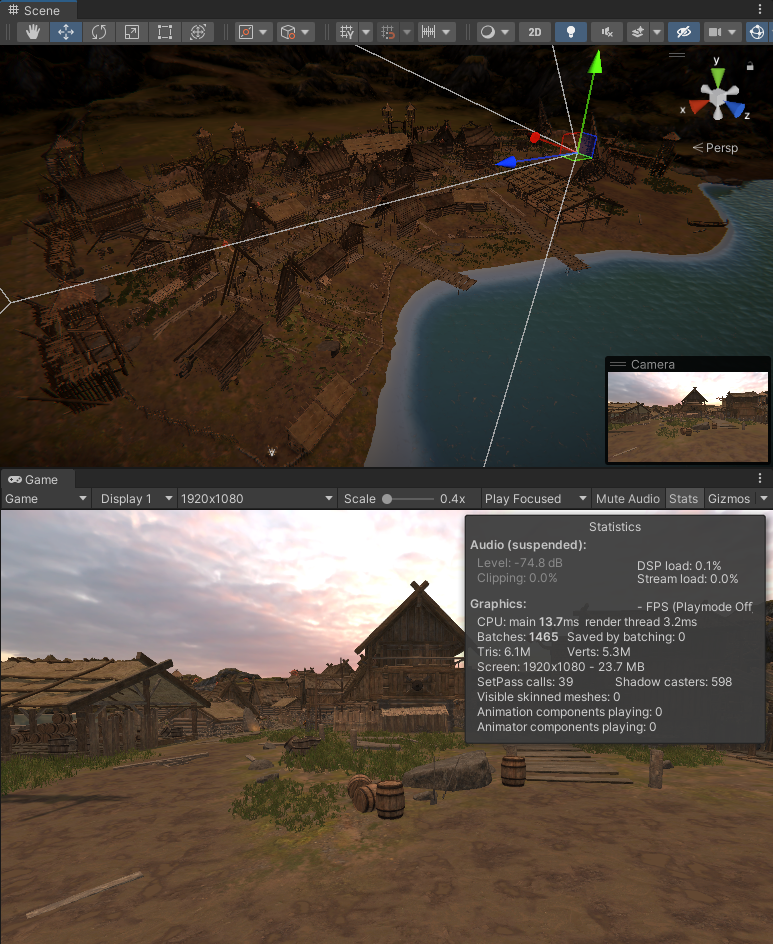
This is where Black Rose Mesh Cutter comes to help. Why not remove useless vertices that cost you GPU time to render?
The main point of this tool is to remove vertices from the scene that will stay unseen the whole time. Specify the play area or point of view and remove unnecessary geometry.
Getting started
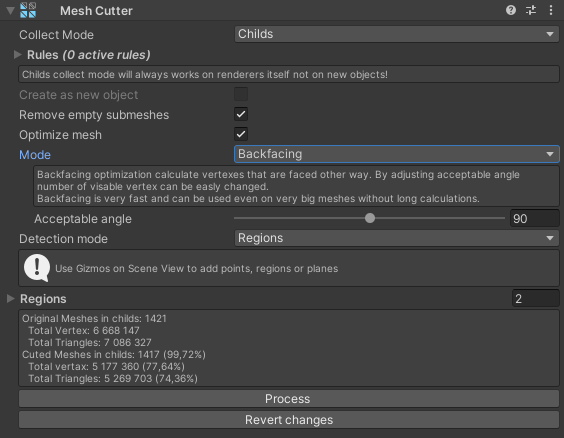
Add the Mesh Cutter component to the parent of the group of objects to cut. It will be used on all MeshRenderers in that object's children if Collect Mode = Childs.
Select your Detection mode, regions will be used in this short guide.
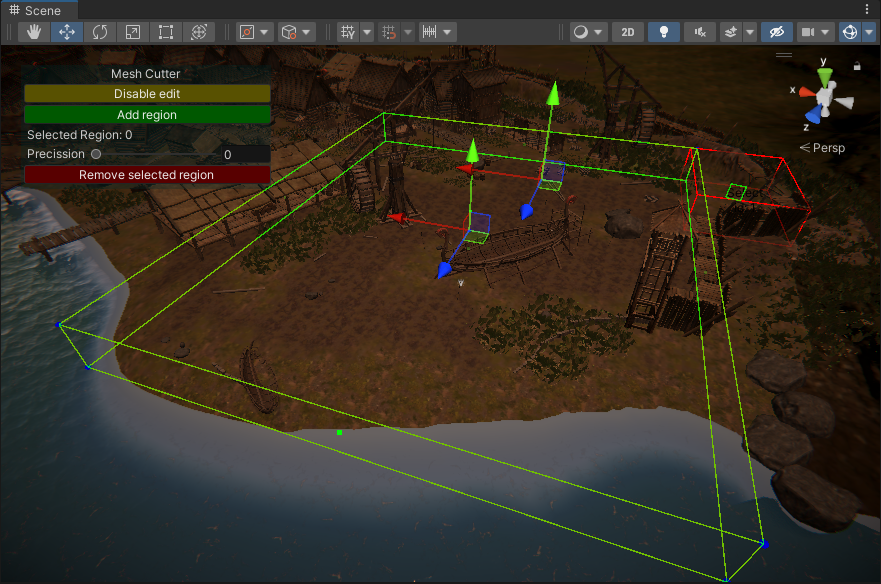
The next step is to set the region. In Scene View, press the Enable Edit button. If there is no button in the top right corner of the scene view, be sure to enable gizmos drawing and to have the selected GameObject with the Mesh Cutter component in the Hierarchy.
Press the Add Region button and cover the whole play area. If one box is not enough, add additional regions to cover the entire play area.

Choose Mode:
- Backfacing is a very fast option, good for testing if the play area is done properly or for basic optimization.
- Unseen is a very time-consuming process that will remove all unnecessary vertices. It will take a lot of time, but the results will be much more optimized than in Backfacing mode.
Keep using Backfacing mode until you are sure that this is the final version of the scene - Unseen mode is VERY time-consuming.

Press the Process button.
After the tool finishes, meshes in children will be replaced with new, cut meshes.

Component Inspector
This section will contain a detailed description of the Mesh Cutter component inspector.

- 1. Collect Mode
- Specify if the cutter should be used on this object or on all children.
- a) Childs
- All children with enabled MeshRenderer will be cut.
- b) Self
- Mesh Cutter will be used only on the MeshRenderer on this GameObject.
- 2. Rules - Options are unique to Child mode
- Specify selection rules to cut only meshes on MeshRenderers that will pass requirements.
- a) By Layer
- Only if Renderers are on specific Layers.
- b) By Static Flag
- Only Renderers with specific Static Flags. Selected flags must be included in Renderer static flags.
- c) With Tags
- Only Renderers with specific GameObject tags.
- d) Without Tags
- All Renderers without specific GameObject tags.
- e) With Script
- All Renderers with specific MonoScript Component. The script must be attached to the same GameObject as the Renderer.
- f) Without Script
- All Renderers without specific MonoScript Component. The script must be attached to the same GameObject as the Renderer.
- 3. Options Unique to Child Mode
- a) Create as New Object - Option enabled only on Self collect mode
- If enabled, a new mesh will be created as a child of the Renderer; otherwise, it will replace the current one in MeshFilter. Note that it will lose all baked light data.
- b) Remove Empty Submeshes
- If all verts in a submesh are marked as unseen, the whole submesh and its material will be cut. It's highly suggested to keep this option enabled for better performance.
- c) Optimize Mesh
- If enabled, meshes will be cleaned from duplicated materials and empty submeshes (During Cutting process, the original mesh will stay unaffected).
- 4. Mode
- a) Backfacing
- This mode will cut only verts that are totally invisible from the play area. It's very fast compared to Unseen mode but will result in less performance boost.
- b) Unseen
- This mode will perform a very complex detection of vertex visibility that takes a lot of time. Always use Backfacing mode to check if you placed WatchPoints and Areas properly before launching Cutter in Unseen mode. The final effect will be very precise and will reduce a lot of geometry from the scene.
- 5. Acceptable Angle
- Decide about the precision of the tool. 90 is the default value; if you decrease it below that value, fewer verts will be cut. Increasing that value over 90 will remove more verts, but they can be taken from visible verts - modify that value with caution.
- 6. Options Unique to Unseen Mode
- a) Resolution
- Specify the precision of vertex detection; the bigger the resolution, the more time will be needed to process all vertices.
- b) Restricted Layer Mode
- During vertex detection, all objects will be only on one layer. It's a good option if you have some rendering performed by scripts - like grass or water. All Renderers will be used, independently from the selected layer - it is not a mask.
- c) Culling Mask or Restricted Layer
- Specify the layer or layer mask that will be used during vertex detection. Restricted Layer will use all renderers without filtering layers.
- d) Ignore Scene Geometry
- In visibility check, do not use objects other than selected to cut. It will be faster but will cut fewer verts.
- Rules - available only if you do NOT ignore Scene Geometry
- the same set of filtering rules from 2. Only Renderers that pass by those rules will block visibility in unseen mode.
- f) Self Ignore
- Decide if the mesh can block visibility for itself.
- g) Scattering
- Increase precision for small tris in visibility checks but increase the time needed to process each of them.
- h) Cutout as Transparent
- If enabled, cutout meshes will be treated as transparent; if disabled, as fully opaque.
- i) Landscape Cooperation
- Use it if you are combining both tools. All meshes outside the Landscape area will be fully cut.
cutterTutorials Tutorials and Examples
Video tutorials will be avaliable soon.


