PipelineChanger 1.0.0
by Black Rose Projects
Loading...
Searching...
No Matches
Custom Material Conversion

About

You can convert any shader to any other using custom conversion. It's simple for basic conversions but also supports more advanced cases with the use of the API.
This section will show you how to do it.

ShaderPairingTool

About

Shader Pairing Tool is a simple UI tool for mapping properties between shaders. Mapped data will be used during custom conversions, providing a straightforward way to convert specific materials to another.
You need to have or create a shader that will work on the other pipeline. This tool allows you to convert all materials with one shader to another one.

Open

To open Shader Pairing Tool, use the menu option:

‍'Tools' -> 'Black Rose Projects' -> 'Change Render Pipeline' -> 'Custom Converters' -> 'Shader Pairing Tool'


Inputs

Insert your shaders in corresponding fields.
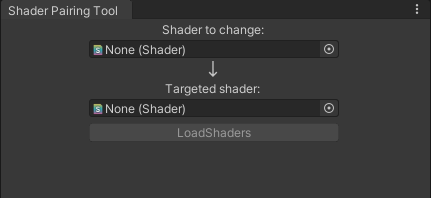
  • Shader to Change
    It should be the shader that is on the current pipeline and needs to be converted to another one.
  • Targeted Shader
    This should be the shader that works in the desired pipeline and will look in a similar way to the first shader.


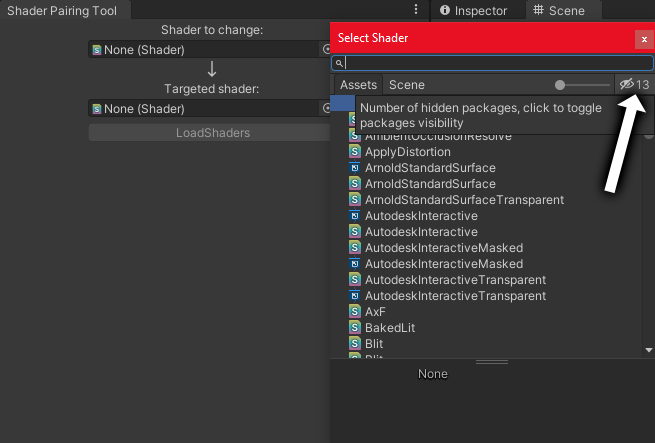
In the picker, you can press the 'Package Visibility' button to see shaders that are in Packages, not only in Assets

Load Shaders data

After shaders are selected, the Load Shaders button will become interactable. Pressing it will scan shaders, gather their properties, and display them in a sorted way.
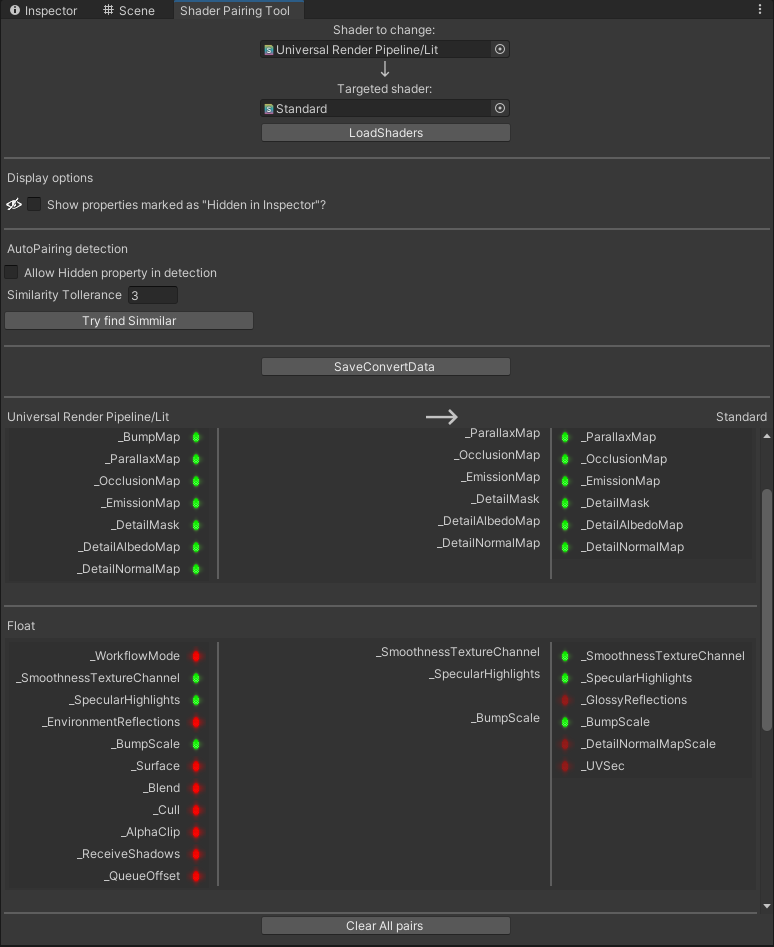
  • 1. Display Option
    • Show properties marked as "Hidden in Inspector"?
      This option allows showing properties that were marked as [Hidden in Inspector].
  • 2. AutoPairing Detection
    • a) Allow Hidden Property in Detection
      Decide if a hidden property should be used in auto-pairing.
    • b) Similarity Tolerance
      The bigger the value, the bigger the difference between names that can be accepted. The default is 3, and we do not recommend increasing that value.
    • c) Try Find Similar
      This button will launch auto-detection on properties by comparing names. It will also compare special cases with typical naming convention differences between pipelines, like:
      _BaseMap and _MainTex or _NormalMap and _BumpMap
  • 3. Save Convert Data
    This button will save all changes to that shader pair into the conversion database for future usage.
  • 4. Clear All Pairs
    This button will remove all matched properties from the current editing session, but it still needs to be saved manually. In this view, all data on the left side is from Shader to Change, on the right from Targeted Shader.

By pressing the Try Find Similar button, you can try to automatically bind similar names, but remember to check if it's a good match afterward. If some properties were not matched, you can manually pair them by pressing the red button near the property from Shader to Change, and next a yellow one near the targeted one from Targeted Shader.
You can press the green button on the Targeted Shader area to remove the created pair.

‍You can match 1:many, but not many:1

After matching all properties, just press the Save Convert Data button. If in the current editing session you cleared all pairs and then pressed Save Convert Data, the shader pair will be removed from the database.

Removing Paired Data

Saved data is stored in the database at BlackRoseProjects\BlackRoseTools\PipelineChanger\Editor\Database in the ConversionDatabase asset. In the inspector of this asset, you can see which shader pairs you created.
Each pair has 2 buttons:

  • Config This one will open Shader Pairing Tool with that specific pair loaded
  • Remove Remove that pair from the database

Creating Converter via code

  • If conversion needs more than simply renaming variables (like enabling Keywords, or setting specific variables based on conditions), you can also create your own converter via C# code.
    First, create a new C# script and make it inherit from BlackRoseProjects.ChangeRenderPipeline.CustomConverter class instead of MonoBehaviour.
public class MyConverter : BlackRoseProjects.ChangeRenderPipeline.CustomConverter
{ }
Definition HDRP_Module.cs:4
  • Implement the RegisterConverter() method and leave it empty if you want to write code instead of using data from Shader Pairing Tool.
    You can import variable conversion data from Shader Pairing Tool by calling the RegisterShaderPair() method here. If you pass the wrong shader pair, there will be an error during conversion.
public override void RegisterConverter()
{
RegisterShaderPair(Shader.Find("CurrentShader"), Shader.Find("TargetShader")); //Add this only if you need to get data registered in ShaderPairingTool. Leave empty if you don't need this
}
  • Create a constructor and add the RenameShader method.
    public MyConverter()
    {
    RenameShader(Shader.Find("CurrentShader"), Shader.Find("TargetShader"));
    }
  • If you need to change any other variable, add one of the Rename... methods in the constructor.
    public MyConverter()
    {
    RenameShader(Shader.Find("CurrentShader"), Shader.Find("TargetShader"));
    RenameTexture("_NormalMap", "_BumpMap");
    }
  • If you need to change more than just variables, you can override the Convert method.
    public override void Convert(Material originalMaterial, Material copyMaterial)
    {
    base.Convert(originalMaterial, copyMaterial);
    //Your stuff like copyMaterial.EnableKeyword("_MYKEYWORLD");
    }
    The original material is the material before conversion, and the copy is the material that stores data during conversion. After conversion, all data from the copy will be transferred to the original.
  • You can also create a finalizer method inside your converter class and use the SetFinalizer API. Remember - that code will be executed AFTER conversion.
    public MyConverter()
    {
    SetFinalizer(Finalizer);
    }
    void Finalizer(Material mat)
    {
    //Your stuff, like mat.EnableKeyword("_MYKEYWORLD");
    }

Converting

Automatic

To run automatic conversion of all/selected materials that have shaders from the registered pair in Shader Pairing Tool or written by you in C# code, you can just use the menu option Black Rose Projects/ChangeRenderPipeline/CustomConverters/Selected or All Materials


Example: Calling by MenuItem

You can also write your own function that will work only on converters that you want. The code below allows you to run your converter on a material that was right-clicked by selecting the MyCustomConversion command in the context menu.

[MenuItem("CONTEXT/Material/MyCustomConvertion")]
static void Convert(MenuCommand command)
{
Material mat = (Material)command.context;
MyConverter myConverter = new MyConverter();
ProcessConvertion(mat, myConverter, UpgradeFlags.CleanupNonUpgradedProperties);
}